
How to Buy a Used Sea-Doo: Pre-Purchase Inspection Guide
By Matt Elliott · Pro Jetski · 2026
Hours only tell you part of the story — I covered that in How Many Hours Is Too Many on a Used Sea-Doo? This is the inspection that tells you the rest. Twenty minutes with the right checklist tells you more about a used ski than any conversation with the seller.
The short answer: a proper pre-purchase inspection covers service history, the impeller and pump, hull condition, the engine bay and electrical system, and a water test. Skip any one of these and you’re buying blind on that point — and blind spots cost money later.
What I’d bring to an inspection: flashlight, T30 torx bit, 10mm spanner, flatblade screwdriver.
Service History (Quick Version)
We’ve gone through this in detail in the Hours article — get the actual paperwork, not the seller’s word. Short version: no receipts means no proof of what’s actually been done, and the price should reflect that risk.
Hull Condition
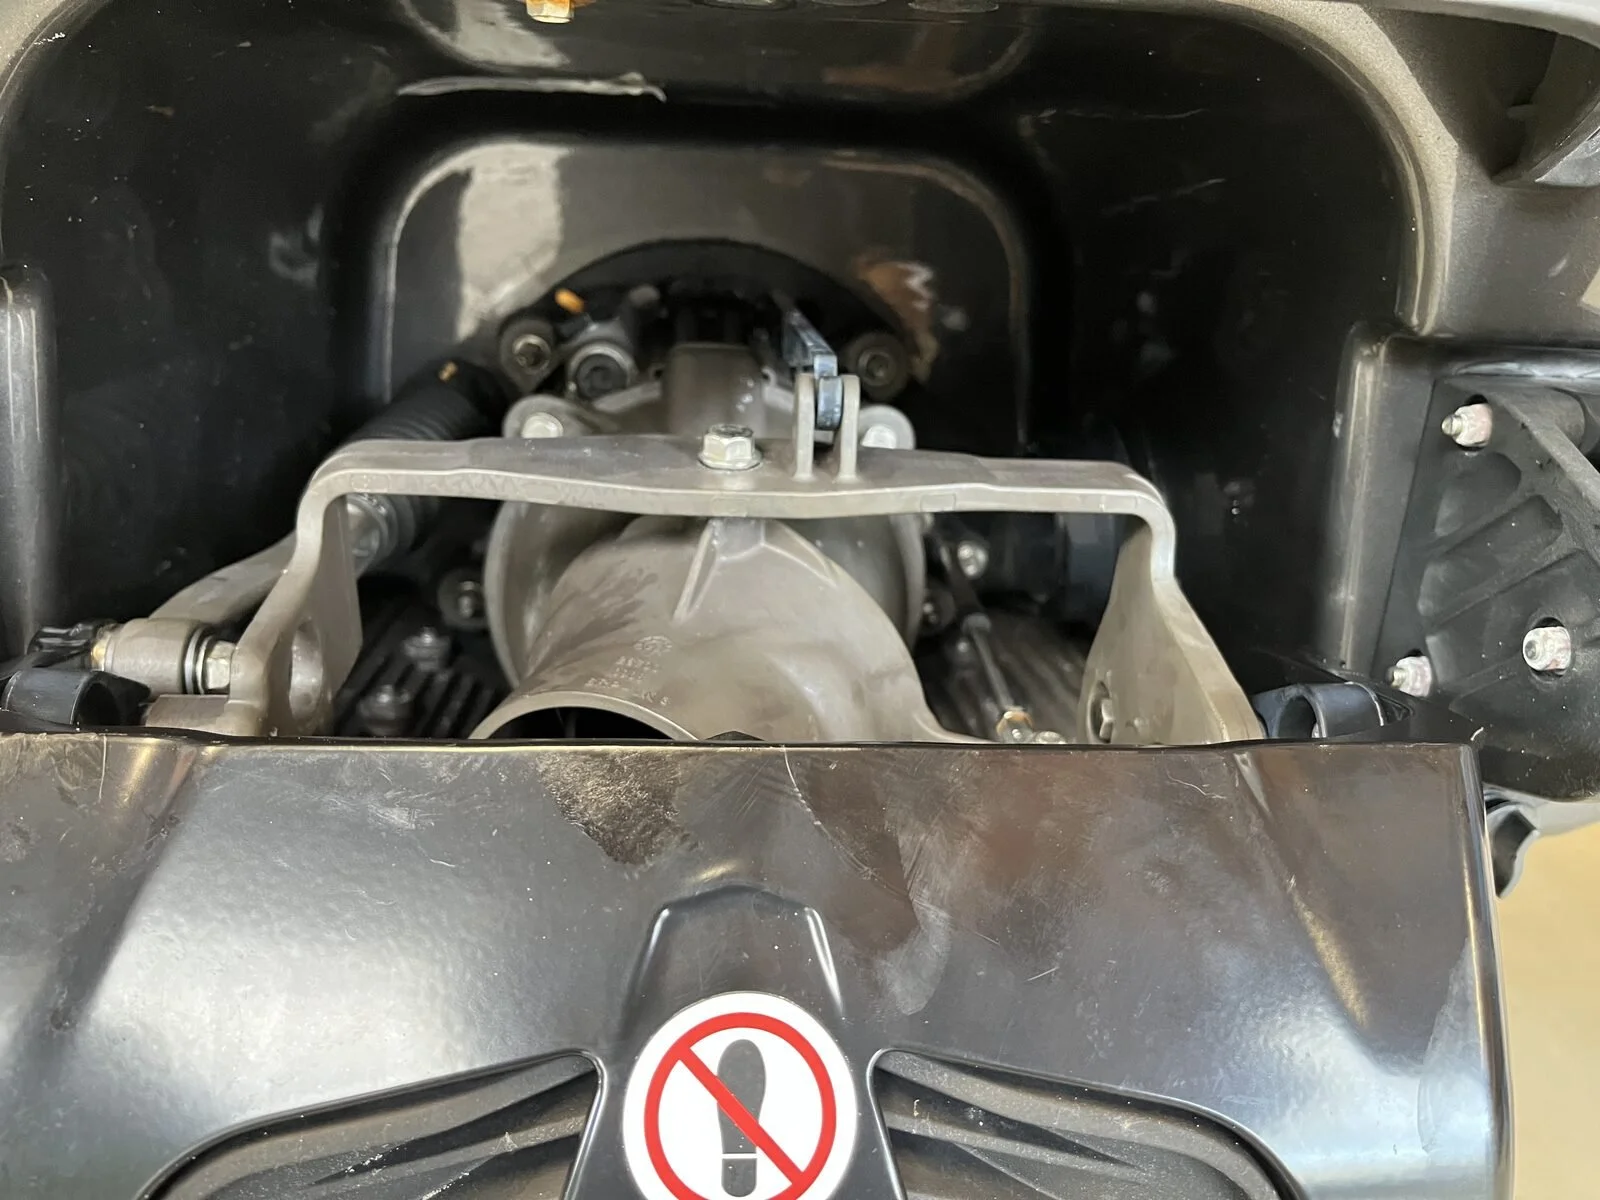
Walk the hull before you look at anything mechanical. Run your hand under the bumpers around the whole ski — that’s usually the first point of contact in a collision, and it’ll quickly tell you about any hidden damage. Check around the ride plate, the pump area and pump tunnel, the keel, and directly in front of the intake area for stress cracks — these spots take the most load and show problems first. Look along the hull for separation or filler. Gel coat that doesn’t quite match, or texture that looks slightly off, usually means a repair happened at some point — not necessarily a deal-breaker, but ask what it was and get it in writing.
Remember you’re buying a used ski, not a new one — it’s going to look used. Expecting a hull free of marks and scratches is unrealistic; if that’s what you want, you should be looking in the showroom, not the used market.
Pro tip: remove the seat yourself. A heavy, waterlogged seat is a sign the ski has been sitting sunk or flipped for longer than it should have.
Engine Bay
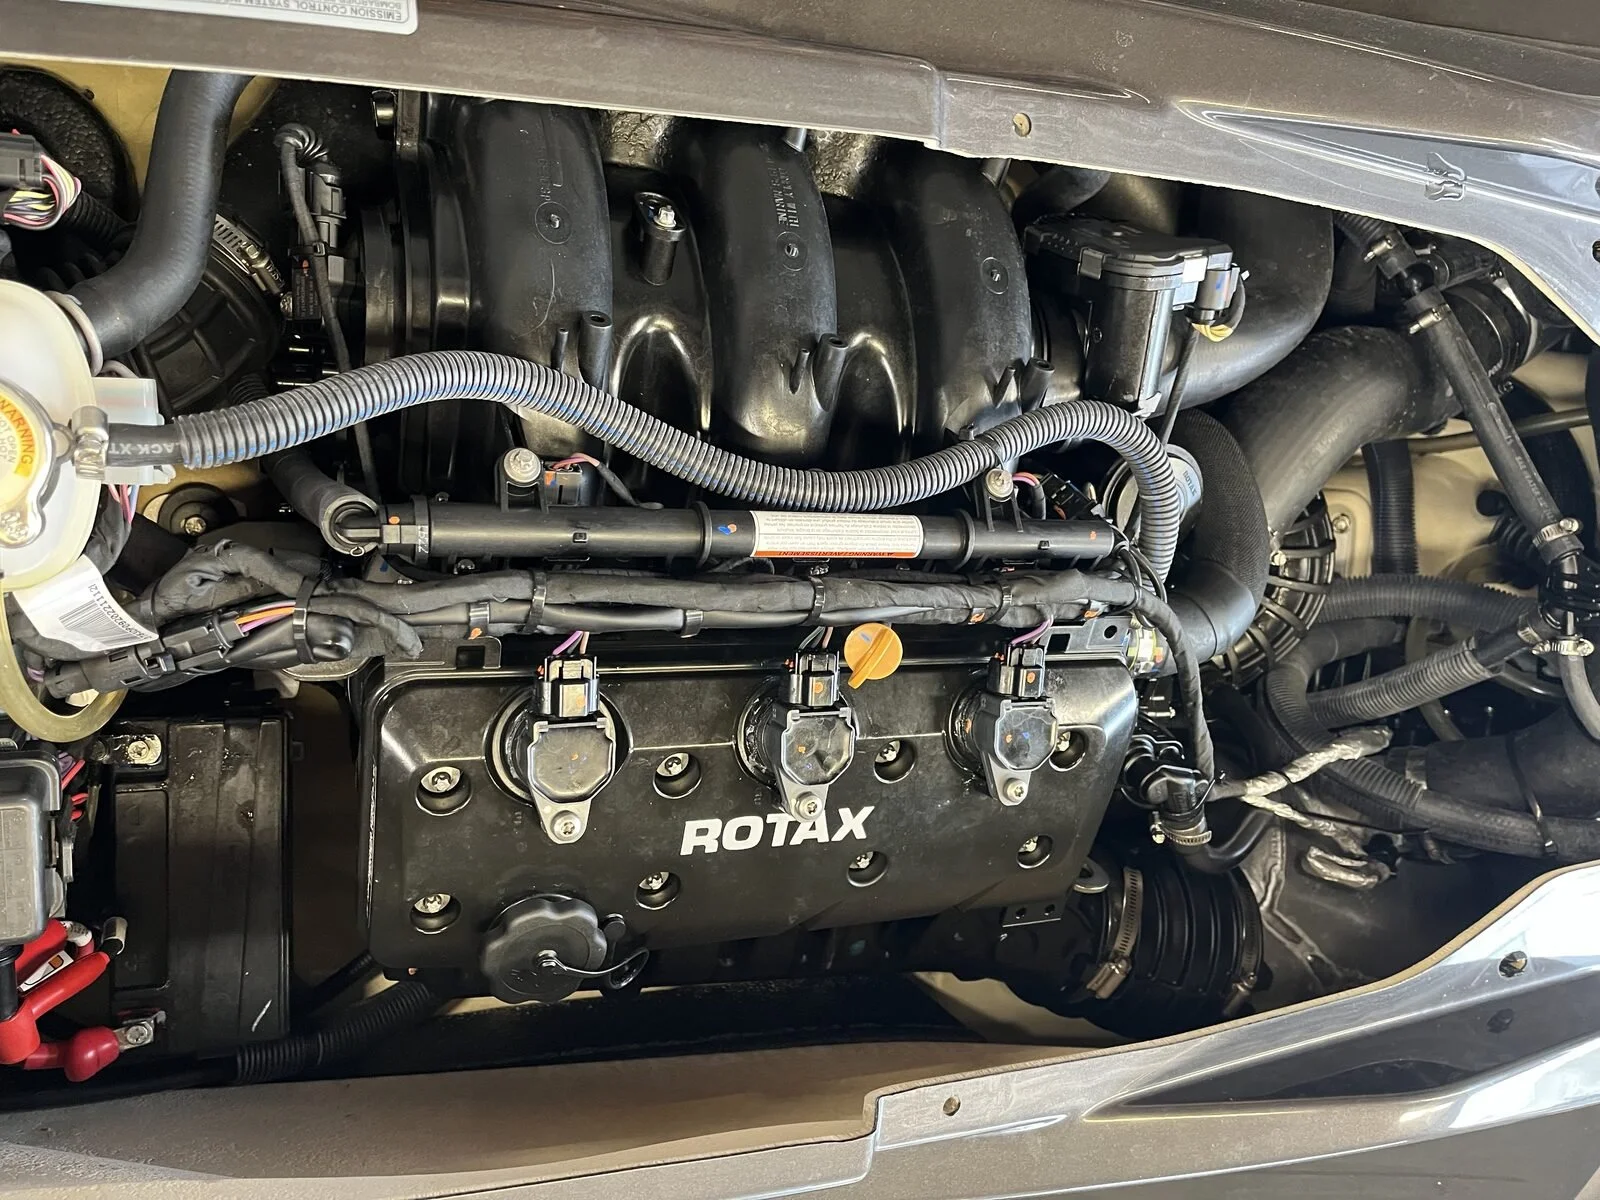
You don’t need to be a qualified mechanic to know what’s going on under the seat. Most of the time a good visual inspection and a basic fluid check tell you everything you need to know. With the seat off — and ideally the plastic deck removed too on 2020-plus models — look for excessive corrosion or staining. A very dirty engine bay (oily, excess fluid, black staining) is a sign the ski has been poorly maintained or has a current issue.
Check that coolant is visible in the tank, red or green and clean-looking rather than cloudy, and pull the oil dipstick to check the oil’s condition — you’re mainly looking for milky oil, which means water has gotten into the system. Clear oil, or oil that’s gone dark and clean-looking, is fine. Look for excessive black dust around the driveline, which points to carbon seal wear.
In salt water environments, check for corrosion generally — orange rust staining usually shows up on hose clamps first. On supercharged models, check the intercooler, since the raw aluminium body can corrode if it isn’t maintained. Loosening the clamp on the throttle body and checking inside the intercooler hose for moisture is a quick way to check whether the intercooler is leaking internally. Black paint flaking off the engine and valve cover is common in salt water environments — it doesn’t look great, but on its own it isn’t something that would put me off a good deal.
Electrical
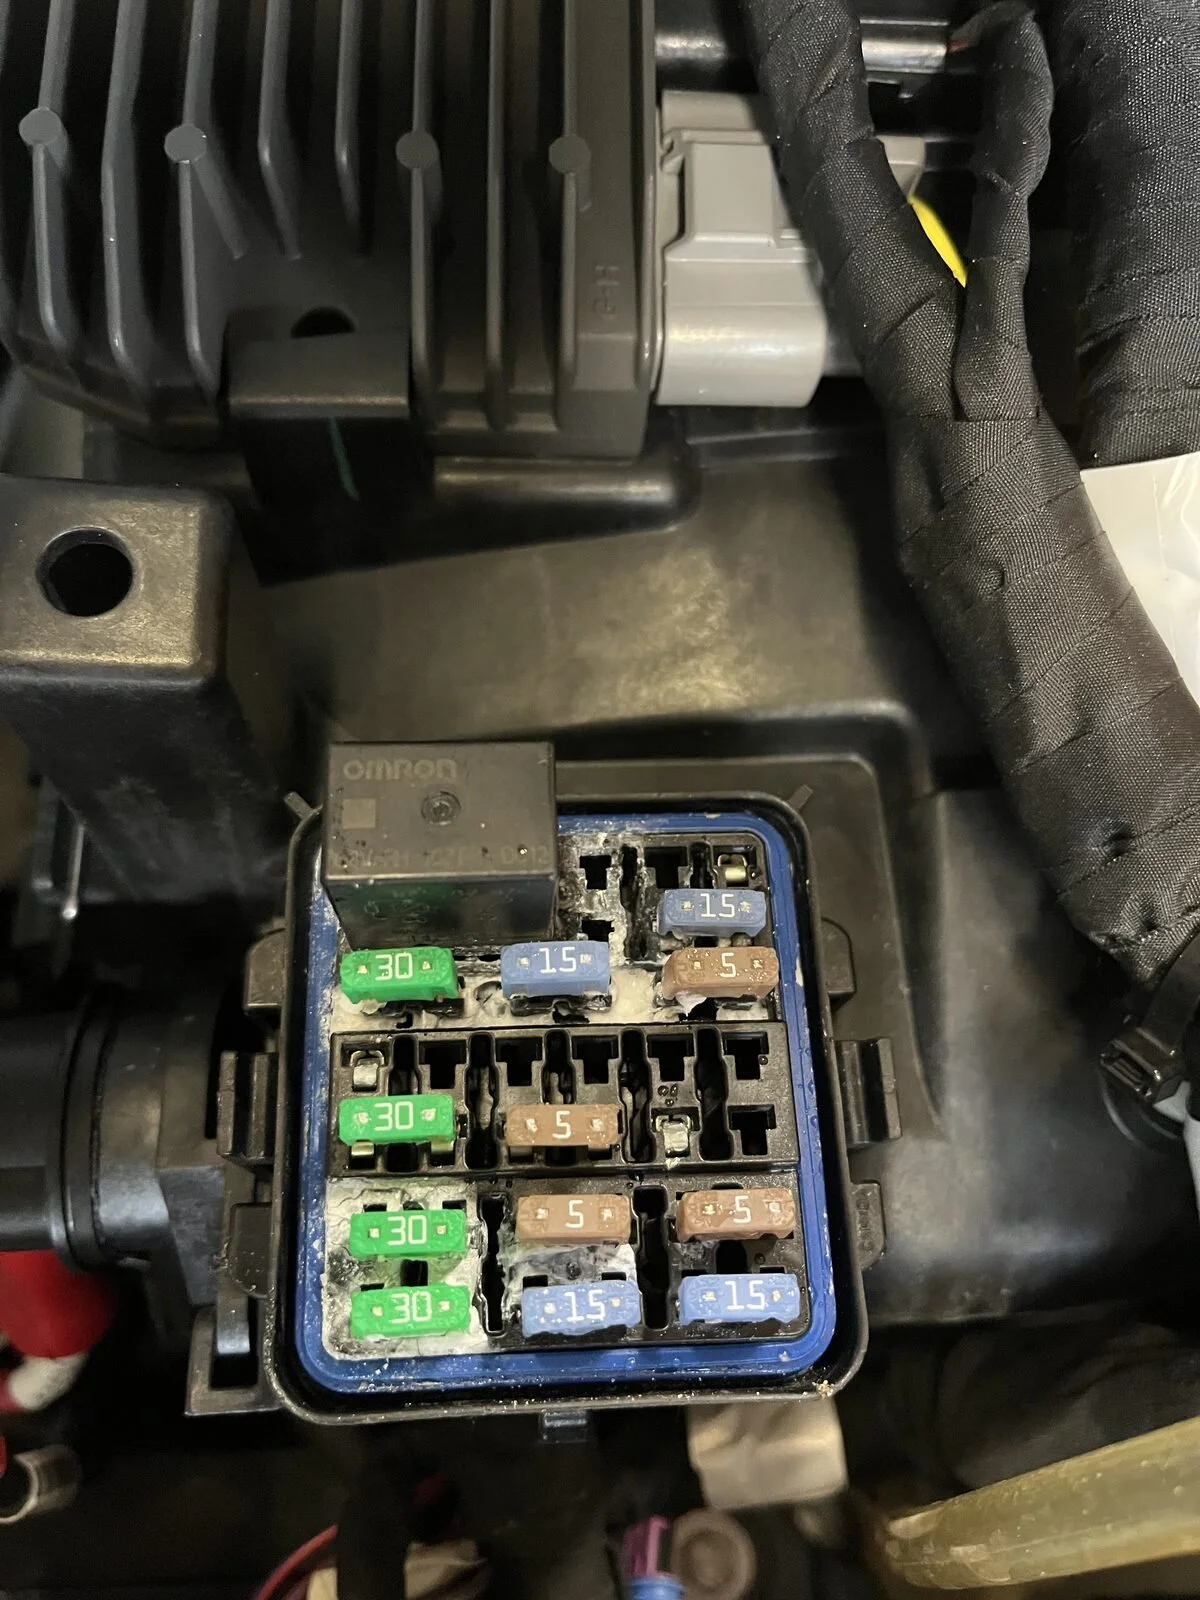
A quick look over the electrical system can rule out future issues. Remove the fuse box cover and look for corrosion or anything that looks like it’s run excessively hot. Most wiring breaks throw a fault in the ECU and show up as a warning on the dash.
Pro tip: a white, fuzzy battery terminal is a good sign the engine bay has had excessive water in it and the battery itself has been submerged.
Confirm the dash display lights up fully with no dead segments, and check for any sign of moisture inside the dash itself.
Impeller, Wear Rings & Pump Condition
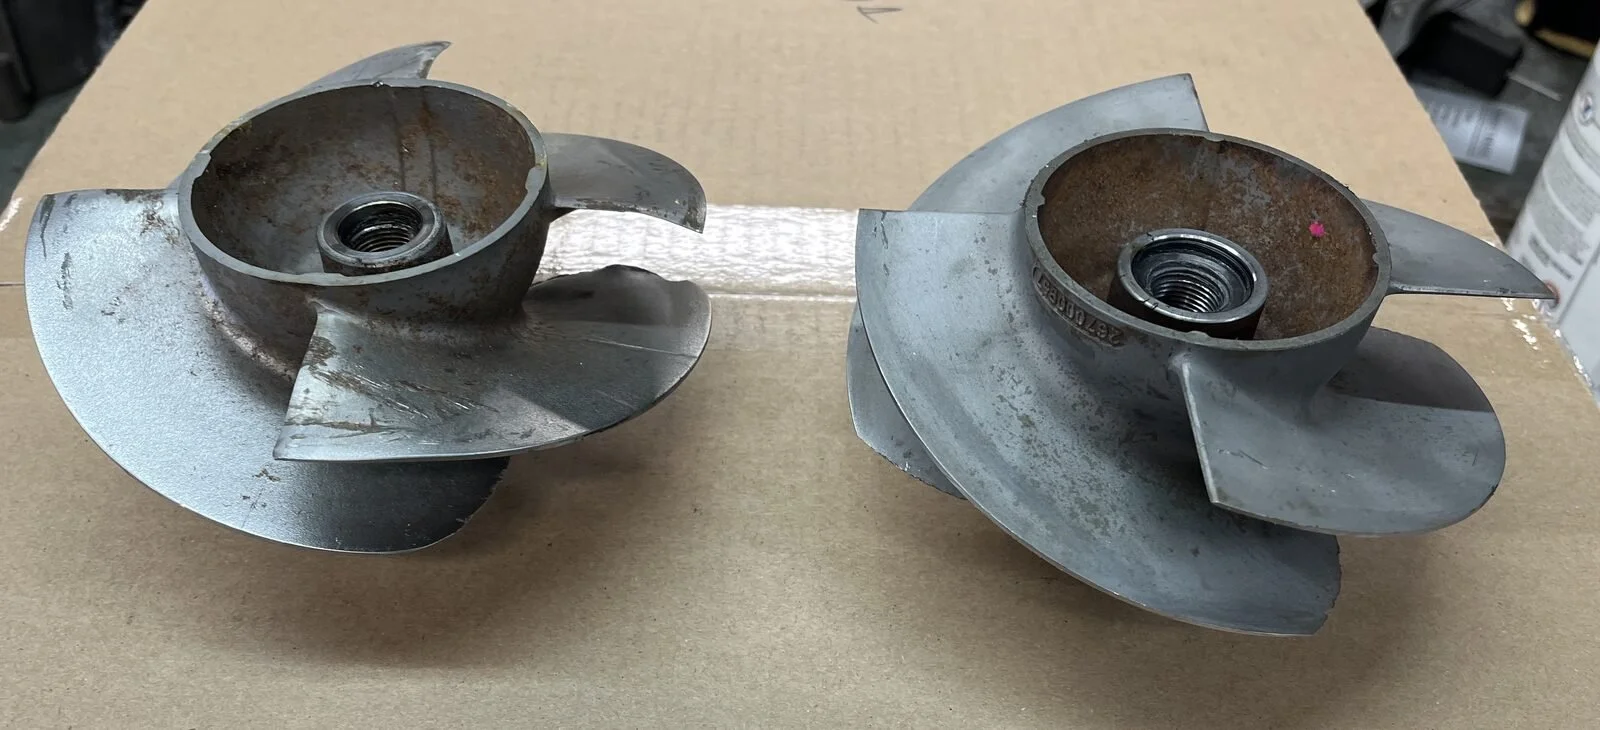
The impeller is one of the hardest-working components on the ski and one of the first places that shows how it’s been treated. Chips, nicks, cavitation erosion or thinned blades point to hard use — sand, gravel, shallow water launching. A healthy impeller on a high-hour ski tells you the owner was careful. A beat-up impeller on a low-hour ski tells you the same thing, just the other way round. Removing the jet unit gives you the best chance to check for damage or wear, but a quick look underneath the ski with a flashlight will usually give you a good impression. The trailing edge of the impeller is just as worth inspecting — you should be able to see enough through the steering nozzle to know whether a closer look is needed.
Spline condition on the driveshaft can only be checked properly out of the water, with the ski on a trailer or stand and the jet unit removed. Worn splines usually come from missed jet pump maintenance, high hours, or hard salt water use without proper care. If the ski fits that profile and hasn’t had the jet unit off and inspected recently, that could be an unexpected cost early in your ownership.
Running on Flush
Running the ski on the flush is a must — it’ll show up faults that won’t appear with the ski just powered up on the trailer.
Note: skis can sound rattly on a trailer, especially iDF models, because the driveline is unloaded out of the water — the trailer itself can add to that noise too. When you run it on the flush, you’re mainly listening for knocking, screeching, or vibration that increases as the throttle comes up.
Don’t run the ski past 90 seconds on the flush — longer than that risks premature wear on the driveline carbon seal. Have your checks ready to go before you fire it up.
The ski should start quickly once the dash is powered and the start button is pressed, without winding over excessively. Once it’s running, there should be no active fault codes (engine light, battery light, iBR light, etc.) on the dash. Put the ski in forward and reverse and make sure it’s displayed correctly on the dash — F, N, R — to check iBR operation. Check that trim is working, activate sport mode, and give the ski a few blips of throttle, listening for anything abnormal. Confirm the engine stops immediately once the DESS key is removed.
Note: a battery light and buzzer once the engine has stopped is common and nothing to worry about.
Trailer Check
Don’t get so excited about the ski that you forget the trailer. Check it over for excessive corrosion, correct skid or roller bunk setup, working trailer wiring and lights, and wheel bearings that aren’t noisy or rumbling.
What’s included in the deal: once you’re happy with the ski itself, get clear on what’s actually part of it — you can’t call back a month later and ask if something was included. Confirm keys, cover, and any accessories (coolers, fuel caddies, ski pole, etc.) up front. These extras are often expensive to replace and can sweeten the deal if they’re included.
The Water Test
Always insist on a water test before final payment — no exceptions. Sequence it properly: agree on price and get a deposit down first, then test. That protects both sides from wasting time on a tyre-kicker. On the water you’re checking for a smooth idle with no hesitation, clean throttle response with no flat spots, full RPM under load (a ski that won’t rev out is telling you something), no warning lights or fault codes, and proper iBR engagement if fitted. Run every function — GPS, iBR, iDF if the model has it.
A seller who won’t do a water test is a seller who knows something you don’t.
This is the same order I go through in the workshop. The Used Sea-Doo Buyer’s Course walks through it in full — the sequence I actually use, what a repair versus a red flag looks like up close, and a printable checklist to bring with you.
Fault Code History
If the seller has had the ski in for service, ask whether a BUDS scan was pulled and whether any fault codes were logged — active or historical. A clean scan with no stored codes is a good sign. For what the codes actually mean, see Sea-Doo Fault Codes: Full List and What They Mean.
Quick Answers
Do I need a professional inspection before buying a used Sea-Doo?
Not necessarily — but if you skip the professional inspection, you need to actually run through this checklist yourself, not skip that too. It doesn’t need special tools beyond what’s in most sheds. A professional inspection makes more sense for a supercharged model, a private sale with no service history at all, or if you’re not confident assessing hull and engine condition yourself.
What’s the single most important check on this list?
The water test. It’s the one thing a seller can’t fake, and it tells you more in five minutes on the water than everything else combined. A seller who won’t allow one is the biggest red flag here.
Can I do a pre-purchase inspection myself?
Yes. Everything on this list is something an owner can check with basic hand tools — a flashlight, a T30 torx bit, a 10mm spanner and a flatblade screwdriver cover it.
What if the seller won’t allow a water test?
Walk away, or price it in heavily. A seller confident in the ski’s condition has no reason to refuse. Refusal is information, whether or not they say why.
Going Further
This checklist covers what to physically check. If you want the full walkthrough — the order I actually go through, model-specific numbers, and the things most private buyers miss entirely — that’s what the Used Sea-Doo Buyer’s Course covers. Drop your email below to be notified when it’s available.